Gateway/Shower water under vinyl flooring in a rental bathroom
Shower water under vinyl flooring in a rental bathroom
Moisture readings set the cut lines: 8 square feet of drywall and 12 square feet of vinyl out, mold confined to the flooring backing, and a simple fix for the cause.
Job date: October 2026. Written from Gateway’s job report.
| Property | Rental home bathroom, Metro East Illinois (property management client) |
|---|---|
| Problem | Localized water intrusion at the shower, with suspected mold |
| Removed | About 8 square feet of drywall and 12 square feet of vinyl flooring |
| Mold found | Minor growth on the vinyl flooring backing only; none in the wall framing |
| Visits | One |
What we found
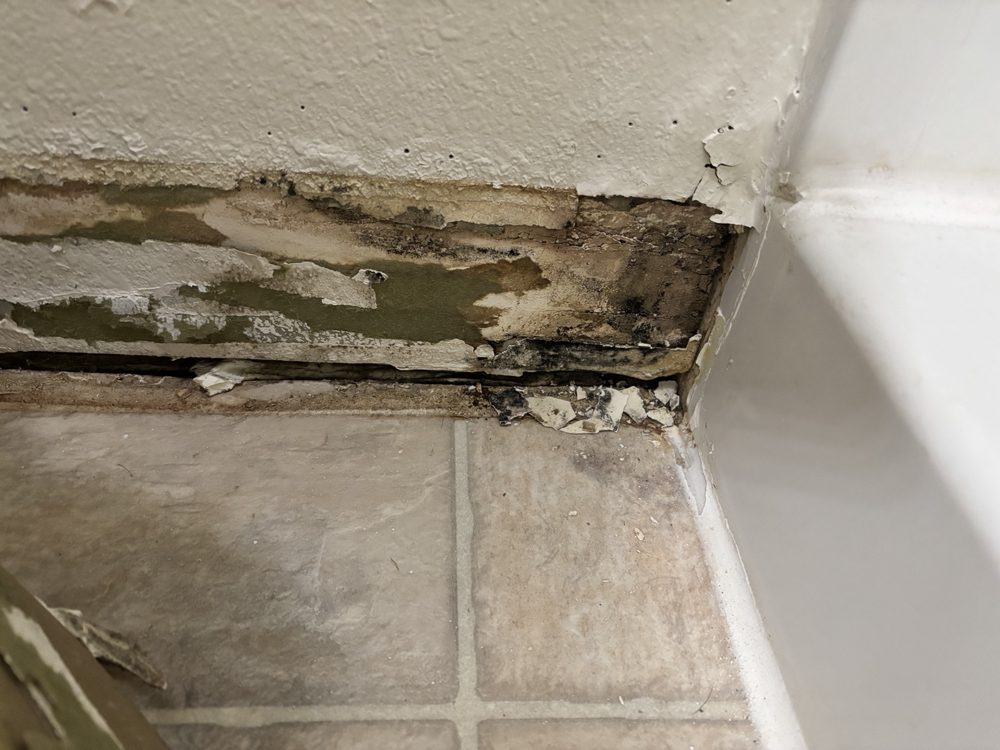
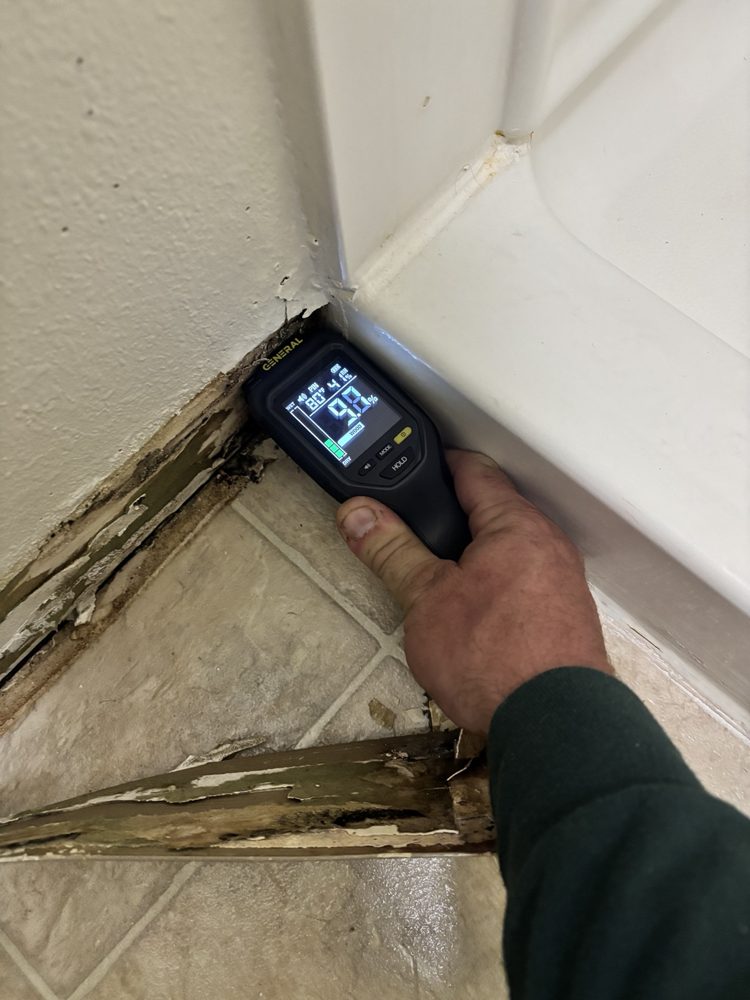
We were called out for water damage beside the shower in a rental home’s bathroom. We started with moisture readings, not demolition: a moisture meter on the wall beside the shower, the wall and floor joint, the corner and the vinyl flooring. The readings and what we could see together showed exactly where the wet area stopped, and that is where we drew our cut lines.
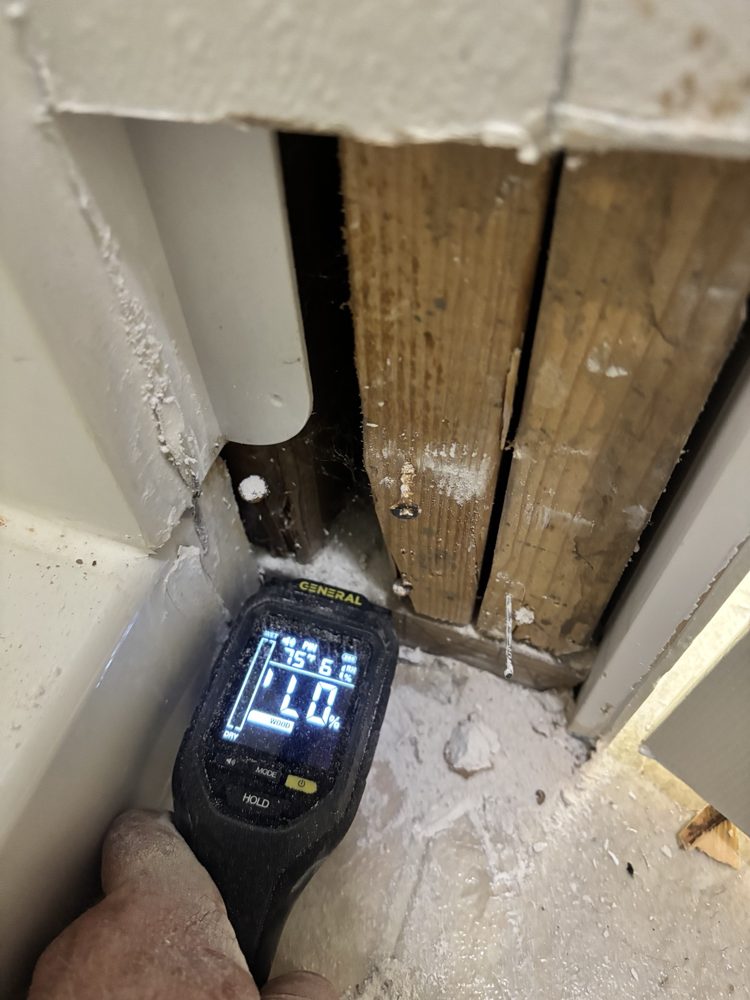
Removal guided by readings
We removed about 8 square feet of drywall and 12 square feet of vinyl flooring, only the materials inside the wet boundary. Then we inspected what was underneath:
- Wall framing: no water damage and no visible mold.
- Flooring: minor mold growth on the backing of the vinyl, which came out with the flooring.
Because the framing was clean and the readings confirmed the boundary, there was no reason to open more wall. Removing materials that are not affected only adds cost to the rebuild.
What we did
- Set up containment and a HEPA air scrubber for the work area.
- Removed the affected drywall and vinyl inside the measured boundary.
- HEPA-vacuumed the exposed framing and subfloor and mechanically cleaned the surfaces around them.
- Applied an antimicrobial (moldicide) treatment to the affected surfaces and the area immediately around them.
- Cleaned the work area before leaving.
The cause, and a simple fix
The location and pattern of the damage pointed to water escaping the shower during normal use rather than a plumbing leak. We explained this to the tenants and recommended a two-curtain shower liner setup to keep water inside the enclosure. We didn’t test the plumbing or the shower enclosure, so our report presents this as the likely contributing cause, not a definitive finding.
What property managers can take from it
- Measure before you remove. Moisture readings kept this job to 8 and 12 square feet instead of a full bathroom tear-out.
- Check what’s under the flooring. The mold here was on the vinyl backing, out of sight.
- Look for everyday causes. Not every bathroom water problem is a leak; sometimes the fix is a shower curtain.
- Be clear about limits. What can’t be seen without more demolition is stated in the report, not assumed.
Related glossary terms
Need this kind of work? See Mold remediation or call (314) 947-3419.
Written by Jake Lusby, owner of Gateway Water & Mold. Customer name and address are left out for privacy. More case studies.
Why a defined water damage process matters
Call. We’ll walk you through step one right now.